Do you know you can create panorama with Adobe Photoshop? We are not talking about the manual way but rather automatic. With the help of Adobe Bridge and Photoshop, creating a panoramic version of your photo can be done within seconds, all you need to do is select your photos to be stitch and let Photoshop do the rest. Fire up Adobe Bridge and Photoshop, full tutorial after jump.
Step 1
In Adobe Bridge, select the photos you want to combine. Hold Control (Windows) or Command (Mac) to select multiple photos.
Image may be NSFW.
Clik here to view.
Step 2
In Adobe Bridge, with the photos in selection, find yourself to Tools -> Photoshop ->Photomerge.
Image may be NSFW.
Clik here to view.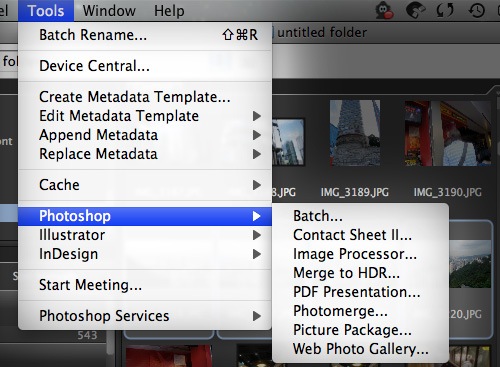
Step 3
Photomerge dialog box will prompt. Select the layout of your panorama (leave default if you have no idea). Click OK and Photoshop will start copying images one by one and do the necessary stitching.
Image may be NSFW.
Clik here to view.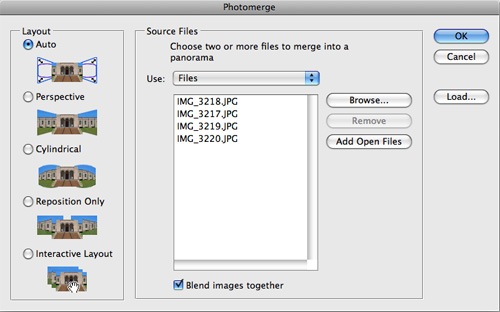
Step 4
Finally, use Crop tool to remove the unwanted parts on the image.
Image may be NSFW.
Clik here to view.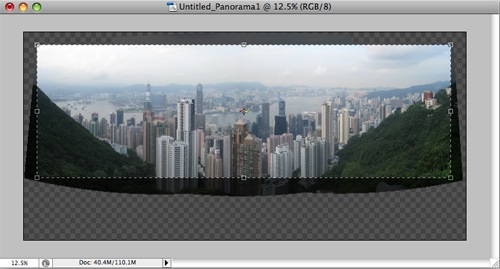
The post Create Panorama With Photoshop appeared first on Design Tutorial,Photoshop,Tips and Tricks.
